Showing posts with label Vegan. Show all posts

Sunday, March 31, 2013

Jade Dumplings for Easter

We were invited for Easter dinner and I volunteered bringing an appetizer.  I used this recipe for Jade Dumplings.  The filling came together really quickly and easily, though I recommend having the filling sit in a sieve to drain out excess water, from the water chestnuts, while filling the dumplings.  Instead of making the little pouches in the recipe, I chose to make them the classic half-moon dumplings where you put it in the center of the gyoza skin:

sorry for the distracting shadow!

Then putting water on half the circumference (with a dipped finger) and folding over into half moons.  Out of habit, I dipped the gyozas in flour on both sides to keep from sticking but it may be unnecessary:


Also, instead of steaming the dumplings I pan-fried them, because I thought they'd hold up better for the travel that way.


And who doesn't like fried dumplings, right?


For dessert, my friend made an amazing raw vegan chocolate cake with raspberry sauce:


Yes, I'm going to need the recipe!

Thursday, March 7, 2013

Buffalo Tempeh

Tried a variation on the Buffalo Tofu, with tempeh.  First, lightly pan-fried tempeh slices:


Then tossed with buffalo sauce:


I liked the texture a lot but the tempeh flavor is more noticeable than when I use tofu. What they're both missing is that crispy fat-fry of the chicken wing skin but they both hit the spot when I'm craving that spicy taste.

Tuesday, February 19, 2013

Easy Chia Seed Pudding

I've been hearing so much about how chia seeds are a Super Food--they are a good plant source of Omega 3 and each 15 mg serving (about a fat tablespoon) provides 6 grams of fiber, 3 grams of protein, and 4 grams of essential fatty acids for 80 calories.  So I decided to give them a whirl.  I had been seeing a bunch of recipes for chia pudding so I thought that would be a good entryway dish to try them.

I put a 1/4 cup of chia seeds in a bowl:


And then I stirred in a cup of almond milk (rice milk, coconut milk, or any liquid should work):


And then I just let the chia seeds absorb the liquid.  I strongly advise stirring it occasionally to keep the chia seeds from clumping (which prevents the individual seeds from absorbing the liquid):


After about 50 minutes, the chia seeds are like little tapioca balls with a little nutty crispness inside:


The taste is pretty much the flavor of the almond milk which is fine but not amazing.  So I experimented dressing it up.  I added 1 teaspoon of unsweetened cocoa powder and a dash of cinnamon, with a sprinkle of splenda and made a cocoa pudding:


I wouldn't rave about the cocoa pudding--I still need to play around with that one.  But adding a few chopped almonds and drizzle of honey made the chia pudding outstanding to me:


Besides being good for me, it was fairly filling too.  Overall, I think I can incorporate this chia pudding easily into my diet. Anybody have other suggestions for chia seeds that they like or find delicious?

Tuesday, February 12, 2013

Red Lentil Soup with Lemon

I have been forever looking for the recipe of a tasty lentil soup that I had once in an Indian restaurant and never could find the recipe. It was called Mulligatawny soup but every recipe I've found looks nothing close to the one I ate. Then I found this recipe and it's hands-down one of my favorite soups of all time.


The recipe was printed in the New York Times: Red Lentil Soup with Lemon by Melissa Clark. I'm still on the look out for a recipe for the tomato and lentil Mulligatawny soup--if anyone has it, please, please, please share it with me. In the meantime, this red lentil soup keeps me pretty happy in the meantime, especially on chilly days.


Sunday, February 10, 2013

Vegan version of Linda's Egg/Spring rolls

I made a vegan version of Linda's egg/spring rolls with slight adjustments. I added some ginger and sesame to make up for the punch of the fish sauce.

I mixed together:
1 lb of firm tofu, smashed up with your hands
1 cup of finely shredded cabbage
1/2 cup finely grated carrots
cooked rice vermicelli noodles, about a cup (roughly chopped so they aren't long)
1 egg
2-3 garlic cloves, minced
1 TBSP of minced ginger
2 TBSP of sesame oil
1 TBSP roasted sesame seeds
generous sprinkle of pepper
scant TBSP of soy sauce


The filling can be made gluten-free if using tamari instead of soy sauce, so I tried to see if I could fry up some of the rice paper that I used for salad rolls to see if I could make gluten-free spring rolls:


I stuck it in the pan with the regular (vegan) spring roll wrappers:


They browned nicely, but the rice wrappers became very al dente and a bit chewy to eat.


So I'm still working on a gluten-free version of these rolls, but in the meantime, these vegan spring rolls are pretty dynamite!

Saturday, February 9, 2013

Vegan Furikake

I love gomasio on rice (which is just ground toasted sesame seeds and salt), but the addition of seaweed makes the rice even more interesting.  Furikake is typically, a combination of gomasio with seaweed and bonito (fish) flakes.  I decided to make a vegan version substituting kelp powder/granules to supplement the briny flavor without the fish flakes.

Vegan Furikake

1/4 cup sesame seeds (white or black or a combo of both)
1/2 tsp of sea salt
1 tsp kelp powder or granules
1 sheet of seaweed/nori (the non-roasted & salted kind--the kind used for sushi)

A major key is to toast the sesame seeds over low to medium heat in a skillet.  You want them to become toasted and fragrant.  A sign they're done is when they start popping:


Then quickly toast the nori sheet.  It toasts up real quick--it'll kind of curl up and change to a lighter color.  I cut it in smaller pieces to fit flatly in my skillet:


You can use a coffee grinder, mortar & pestle, or a suribachi like mine.  If you use a coffee grinder, set aside half the sesame seeds in a jar.  If you use a mortar & pestle or suribachi, set aside a fat tablespoon.  Grind the remaining sesame seeds, salt, and kelp powder/granules until coarsely ground:


This is the kelp granules I use:


Using kitchen shears, cut the seaweed into strips, then into smaller pieces:


Add everything to the jar with the whole sesame seeds and mix:


Really jazzes up brown rice and tofu!


Friday, February 8, 2013

Hotteok (Korean Sweet Pancakes)

I was gifted with Marja Vongerichten's cookbook, "The Kimchi Chronicles" and had to make these sweet Korean pancakes--makes the best breakfast on a chilly weekend morning:


This video slideshow does a great job demonstrating the recipe and what everything is supposed to look like at various stages.  It may seem challenging but it came together pretty easily.  Here's my balls of dough waiting to be filled.


I went with the traditional brown sugar and nut mix as well as vegan chocolate chips:


And they cook very easily in the fry pan:


And beautifully.  You don't want to cook too fast on high heat because you want to give the filling time to melt inside:


Love that crispy golden brown color:


That melty chocolate goodness is heavenly!


I recommend making them when you have guests and can eat all of them while they're warm. They're a little less dazzling once they're cold. Looking forward to making these again soon...

Thursday, February 7, 2013

Vegan GF version of Sesame Chicken Noodle Soup

During the time when both my husband and daughter came done with the FrankenFlu of 2013 (after I recovered from it), I made them this Sesame Chicken Noodle Soup from this recipe at Epicurious:


They loved it but I also altered it to make a vegan, gluten-free version:

Sesame Tofu Noodle Soup

Toss together:

1 pound tofu, cut into thin strips
3 tablespoons gluten-free tamari
2 tablespoons dry Sherry (I didn't have any--I used rice vinegar)
1 tablespoons dark sesame oil

In a separate bowl, mix together:

3 garlic cloves, minced
3 tablespoons tahini
2 tablespoons minced peeled fresh ginger
1 tablespoon sugar
1 tablespoon seasoned rice vinegar
1 1/2 teaspoons chili-garlic sauce

Heat 1 tablespoon sesame oil in heavy large pot over medium-high heat. Add 4 cups chopped cabbage (ideally Napa cabbage, but I used standard green) and 6 chopped green onions and sauté until cabbage is tender, about 5 minutes. Add 2 quarts vegetable broth and bring to boil. Add tofu mixture and tahini-garlic mixture. Reduce heat to low and simmer until soup is hot, about 5 minutes.  Add 1/4 cup chopped cilantro.

Separately cook about 8 oz of rice noodles according to package directions.  Lay some in a bowl and ladle hot soup on top.  Top with more chopped cilantro if you like.

Brought the tofu soup to a friends house to share--the kids loved it!  Either way, both soups are great comfort food on a chilly day.

Saturday, January 5, 2013

Buffalo Tofu

Sometimes I crave the flavor of a certain food, though not necessarily all that goes with it.  Like sometimes when I'm watching football, I really crave the spiciness of Buffalo wings, but not necessarily the wings.  So I made some Buffalo Tofu.  I cut a pound of some pressed firm tofu into sticks and panfried them to give them a little "bite".


Then I heated up half a cup of Frank's Hot Sauce, a tablespoon of margarine, and 1/4 tsp of garlic powder just until it was warm and blended.  Them I tossed the tofu sticks:


Whipped up a simple vegan ranch sauce with 1/4 cup vegan mayo, 1 tsp of dried parsley, 1/4 tsp of garlic powder, 1/4 tsp of onion powder, and about 1 TBSP of rice milk to thin it into a sauce (add more if necessary).


Hits the spicy spot!

Wednesday, December 5, 2012

Good old Oatmeal

We've been having a few chilly mornings, and I've just been craving hot food for breakfast, like coffee cake. Unfortunately, I don't always have the time or caloric allowance to eat coffee cake as much as I like so I kind of rediscovered oatmeal again. Here's my current mix:


It's regular oatmeal drizzled with honey, sprinkled with cinnamon, slivered almonds, chopped walnuts and a healthy splash of soy creamer.

I'm kind of in that stage where I'll eat this for days straight and already looking forward to eating tomorrow morning. Any other hot breakfast suggestions?

Sunday, November 25, 2012

Vegan Coffee Cake

Post-Thanksgiving on a chilly morning, I was still in comfort food mode and was craving coffee cake and hot coffee.  When I was a kid, my favorite coffee cake memory was making it using the Aunt Jemima Coffee Cake mix.  I remember adding an egg and milk to the mix in the bag and you mashed it together in the bag and then poured it in the included aluminum tray.  It came with a waxed paper envelope of crumb topping that you topped the mix with and it baked perfect.  I loved it--there were never leftovers.  I found an enticing recipe for vegan coffee cake on Poppytalk blog and gave it a go:


I decided to make it without the optional berries, and it was just what I wanted.  It reminded me of the classic Aunt Jemima coffee cake and was perfect on a chilly morning with hot coffee.  I'm definitely making this again!

Friday, November 23, 2012

Gluten-free Vegan Pumpkin Pie


For Thanksgiving this year, I decided to make a vegan pumpkin pie and found this great and fairly easy recipe:  Pumpkin Pie with Gluten-free Pecan Crust.  One note:  though this recipe is gluten-free, it isn't nut-free so it's not acceptable for those with nut allergies, unless you switch out the crust with a gluten-free, nut-free one.

I loved the crust while I was making it.  You know how cookie dough is great in it's dough form, sometimes better than it's finished cookie form?  The crust was like this--I could have eaten the crust dough straight.  It was a great mix of nutty, sweet, and salty.  These elements became much more subtle after baking it with the pumpkin filling.  Overall the consensus was that regardless that this pie was vegan and gluten-free, this pie was a delicious.  I recommend it as a great change-up at your next Thanksgiving buffet!

Sunday, November 4, 2012

Maple "Butter" Bars

I've been testing out recipes that me and my nephew (with specific allergies) can enjoy together and this one from Flying Apron's Gluten-Free & Vegan Baking Book caught my eye. It's supposed to be like shortbread which I love. I really wish this book had more pictures of their recipes, so I knew if these look right.  Since I don't have a mixer, I mixed it by hand with a strong fork and I'm wondering if that changes the composition a lot.  I also used a 9x13 pan instead of the 9x12 pan, so I think they're thinner than they're supposed to be:


They are tasty and not overwhelmingly sweet and I certainly enjoy them, but they seem very dense and chewy, rather than crisp which I associate shortbread with.  Also, when I pulled the pan out of the oven, the coconut oil had bloomed to the top and was just sizzling/boiling when I pulled the pan out of the oven, though it eventually settled back down into the cookies as it cooled. Also, the recipe advised to score the cookies while they're hot, but I found this unnecessary and was able to cut them into bars pretty easily.  Hmm, maybe I need to try this out with a mixer sometime and see if it changes things.  Anyone familiar with this recipe and can tell me if I made these right? 

Anyhoo, if you'd like to try making these (it's pretty easy with 5 ingredients)--please let me know how they turned out (especially if you've got a stand-up mixer)!

Maple "Butter" Bars

- Preheat oven to 375 degrees
- Combine 2 3/4 c of brown rice flour and 1/2 tsp salt in a medium bowl.
- In the bowl of a stand-up mixer fixed with paddle attachment, combine 1 c coconut oil (or palm oil), 1 c maple syrup, and 1 tsp vanilla until well mixed. With mixer on low speed, add flour mixture a little at a time until well mixed, about 3 minutes.
- Spread batter evenly into a parchment-lined 9x12 pan. Bake until edges harden slightly, about 15 minutes. While dough is hot, score it into 12 pieces with a knife. After it has cooled, slice it the rest of the way through and remove bars from pan.

Wednesday, October 31, 2012

Roasted Pumpkin Seeds

After cutting up our Halloween Jack O'Lantern, I saved the seeds, gave a quick rinse to get most of the pumpkin goo off, tossed with olive oil, and spread them out on a baking sheet. Then I sprinkled a little garlic powder and sea salt:


I put the pan in a 300 degree oven. I tossed it a bit after 20 minutes and then roasted for another 35 minutes:


Man these were so good. They came out so crispy and were seasoned just right. So much tastier than the prepared pumpkin seeds in the stores. It's only a bummer that there weren't more pumpkins to get more seeds from.

Definitely better than the candy!

Monday, September 24, 2012

I love this No Knead bread

Now that summer has been slowly receding, I've been back into making bread.  Unfortunately, I think I neglected my sourdough starter and it's not quite the same, even though I've been baking it in my dutch oven--which makes the most beautiful crust.  But I still haven't been getting the chewy holey-ness inside.  I would probably fault my crappy kneading skills, though a friend's mom said I need to get a standing mixer with a kneading paddle.

So then I thought about the original No Knead bread recipe that Linda originally posted about and thought I'd give it a try since kneading dough is not my friend and it was only reaching 80 today--brrrr!  Get the oven on!

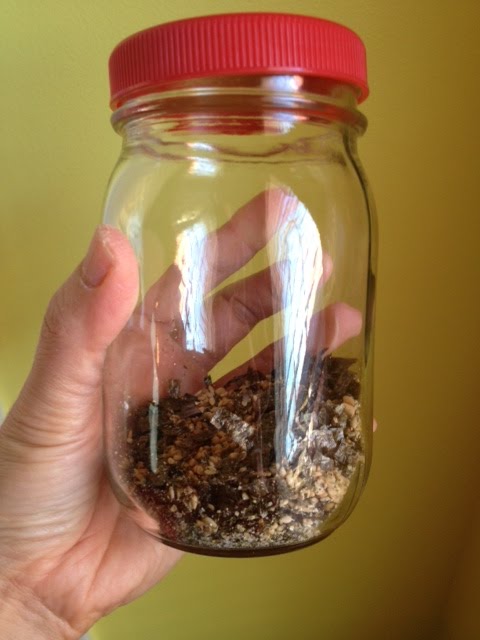
The ingredients are pretty simple:

Dissolve 1/4 tsp of active dry yeast in 1 1/2 cups of warm water.  Stir in 3 cups of all purpose flour and 1 1/2 tsp salt until blended.  It'll be sticky and pretty slack.  Cover the bowl with plastic wrap and let the dough rest at least 8 hours (up to 18 hours) at room temperature.  The recipe says room temperature is about 70 degrees but my a/c thermostat is set at 78 but it seems it was all right.  The dough is ready when the surface is dotted with bubbles:


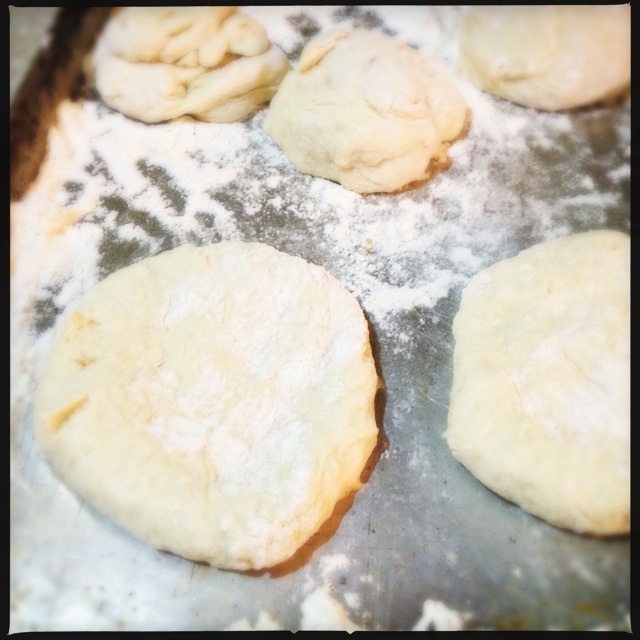
Then you flour the work surface and scrape the dough on it.  Sprinkle the dough lightly with flour and fold it over on itself a couple of times:


Cover with plastic wrap and let it rest for 15 minutes.  Using enough flour to keep dough from sticking to your hands and work surface, form into a ball.  Then generously coat a dish towel with flour and put the dough ball, seam side down on it.  I didn't have a clean dish towel, so I used parchment paper:


Then dust with more flour and cover with another clean dish towel.  Let rise for 1-2 hours until doubles in size and dough doesn't spring back when you poke it.  I couldn't help but notice that it doubled out but not up.  I wonder if using a dish towel would have been more grippy, allowing less slide of dough out.


Put dutch oven in the oven and preheat to 475 degrees about 20 minutes.  Flip dough into the hot dutch oven, ostensibly seam side up, though mine didn't have much of a seam.  Is it because I didn't use a dish towel?  I'll have to test that out.


Bake 30 minutes with lid on, the 15 minutes more with the lid off.  There's that golden brown crust:


And more so, that chewy, holey inside:


The girl and I ate half the loaf in one sitting. She loved it. I would have loved it more if it was more taller and loafy instead of such a wide, flatter boule. Hope using the dish towel works during the second rise helps. Also, I'm wondering if I could add sourdough starter to this somehow? Anybody know breadmaking science a lot more than me and have advice?

Anyhoo, I highly recommend this bread--if you've got a Dutch Oven, it won't disappoint. It's cheap and easy (NO KNEADING!) and the result is virtually artisan bread!

UPDATE: Yes, using a dish towel (instead of parchment paper) made a huge difference:


It definitely rose more "up" than out.


There's the big beautiful boule I wanted!


Gorgeous.  Sigh.


Here's a little side by side comparison:


Definitely a favorite.